What Type Of Car?
There are about 5 car types. Here is a quick overview so you can decide whats best for you.
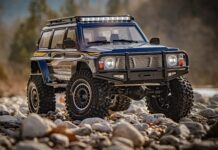
Road/Touring/Rally Cars
These are typically the fastest and sharpest handling cars and best on paved, flat surfaces. Rally variants are normally based on a on-road car with a slightly higher ground clearance – although these still need to be used on flat surfaces. Most on-road cars are 4WD and driven by a shaft.
Drift Cars
Drift cars are very similar to on-road cars but with slick plastic tyres and different gear/diff set ups. Drifting when mastered is very fun, however its not something you will master within a couple hours! You can always purchase a standard on-road/touring car and add drifting wheels/tyres if you do not want to drift all the time.
Buggies
Buggies are a cross between off-road and on-road cars. They perform fairly well on road due to their low centre of gravity and ground clearance, but these traits can hinder off-road performance when the ground is too bumpy or rough. Buggies are best used on short flat grass, fine gravel and dirt. Buggies are good for those who cant decide what type of car they want, since it offers both on- and off-road use. Our Buggies are usually 4WD.
Truggies
Truggies are also a crossover like buggies, but they are more suited to offroad use. A truggy is basically a buggy chassis with larger wheels/tyres. Like buggies, truggies can be used on road but with a higher ground clearance their performance is often worse than a buggy on-road. However this higher ground clearance does equate to better performance off-road. Our Truggies are usually 4WD
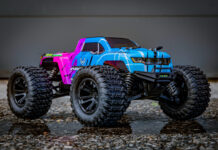
Monster Trucks
Trucks are designed for use offroad. They come with large grippy tyres which are best suited for use on grass, mud, gravel and pretty much any rough surface. Trucks can be used on road, but due to the high centre of gravity and ground clearance they are prone to rolling over at speed. Monster trucks are usually 4WD.
Assembly KIT or Ready-To-Run (RTR)?
Assembly KITs
Assembly kits require fully assembly. The cars normally come in a couple hundred pieces with a detailed instruction manual. Assembly time depends on the model, but you can build a 1/10 Buggy in 5-10hours depending on your knowledge/experience. Building the car is an enjoyable process and gives you great knowledge on how the car works – this can be very helpful if you need to maintain or repair the car in the future.
Please note that assembly kits normally require a lot of extra pieces to get the car running, see the next question for the list of components required and what we offer.
Ready to Run (RTR)
This is fairly self explanatory and most of the smaller RTR cars (1:16 – 1:32 scale) only require AA batteries for the transmitter. You can normally charge the battery and be running within a couple of minutes. Ready to Run cars are normally identical to the assembly kit and have been assembled in the factory.
Please note that bigger RTR cars (1:5 – 1:10 scale) do not include a battery and charger to let the customer decide which type of battery (NiMH or LiPo) and a suitable charger they would like to have. Please find more information in our battery guide below.
What Do I Need?
What you need to get the car running depends on whether you buy a Ready-to-Run Car or an assembly KIT.
Assembly KITs
Assembly kits normally come without any electronic parts at all. To get the car running you will need to purchase a drive set (motor and speed controller), a radio set (transmitter & receiver), steering servo, battery pack and a charger.
Here is a list of all the bits you need for a car to operate. All necessary parts you could purchase in our shop.
Chassis
Motor (brushed or brushless)
Speed Controller (suitable for motor BR or BL)
Steering Servo
Transmitter & Receiver
Battery
Charger
Ready to Run
Most Ready-to-Run cars come with everything you need apart from AA batteries for the transmitter. All the parts will be installed and ready to use. As above the bigger scales (1:5 to 1:10) we offer without a battery and charger – in which case you only need a suitable battery pack and charger.
Brushed or Brushless?
Most entry level RC cars come with a Brushed Electric motor, where more expensive models come with more efficient and powerful brushless motors.
As a rule of thumb you can normally assume a Brushless car will offer a higher level of performance – especially with a LiPo battery. A Brushed set up is easier and safer to use – especially with a NiMH battery.
Electric or Nitro?
We do not stock Nitro cars as they can be notoriously diffilcult to use and set up. They offer great performance and for years were the go to for people looking for speed and power. However in recent years, developments in battery power (specifically Brushless LiPO set ups) has put Electric back infront in the power/performance game.
BATTERIES & CHARGERS
How Long Will My Battery Last?
Its hard to put a number on battery life as its affected by many factors: Car weight, how fast you drive, the terrain, battery capacity etc.
However we will try to give you an idea.
2000mah 7.2V NiMH in a 1/10 Buggy – Approx 15mins with normal use.
3000mah 7.2V NiMH in a 1/10 Buggy – Approx 20-25mins with normal use.
a.s.o.
Can I Get A Spare Battery?
We always recommend to have at least 2 batteries for your RC car. 2 Batteries gives you flexibility so that you can:
– Be using the car whilst a battery charges
– Extend use by using 2 batteries on after another
– Have a spare incase you have an issue with one
In the perfect world we’d suggest you have 3/4 batteries so you can always ensure you have enough charge to enjoy the car. There is nothing worse than having to cut your fun short because your batteries die!
Can I Get A Faster Charger?
We sell many types of chargers, slow wall chargers right up to digital chargers with detailed battery information. We recommend purchasing the fastest charger you can, so you can get back outside again!
Slow Charger = 0.8A. Or approx 6hrs for a 5000mAh NiMH battery.
Middle Charger = 5.0A. Or approx 1hr for a 5000mAh NiMH battery.
Fast Charger = 10.0A. Or approx 30mins for a 5000mAh NiMH battery.
For LiPo batteries its a bit different… please see our next category
How To Use LiPo Batteries?
Lithium Polymer or LiPo batteries are the preferred choice when it comes to powering modern RC models – especially Brushless cars. While they do provide unprecedented advantages over their predecessors, they also come with more risks.
- Never try to disassemble or alter a LiPo pack by yourself; if the inner foil is exposed to air, your LiPo may explode.
- Never intentionally puncture, smash, bump, hit, or apply any unnecessary force to your LiPo pack or related components.
- Never keep sharp objects near your LiPos. A ruptured foil or wrapping can lead to a fire.
- Never immerse your LiPos in water and mitigate any possibilities for getting them wet.
- Always handle your LiPos with care and avoid dropping them from height as this may lead to an internal short which can lead to a fire.
- Always keep your LiPos in fireproof bags when not in use and refrain from putting them into your pockets even for short periods
- Always take your LiPos out from your model and store them in a fireproof bag when you’re done.
- Always keep your battery connectors/ terminals away from metal objects as this can lead to a short circuit which may ultimately lead to a fire.
- Never expose your LiPo batteries to extreme temperatures or in direct sunlight for prolonged periods. The suitable temperature range is between 40 – 120°F (4 – 49°C).
- Check the Internal Resistance (IR) and Voltage (V) of your LiPos which have been stored away for more than six months. For regular LiPos, the voltage of each cell should not be below 3V while the IR should not exceed the original value by over 80-90%.
How To Charge A LiPo Battery:
- Always charge your LiPos with a charger designed for LiPos. If a charger supports multiple chemistries, make sure to choose the right option. Failure to do so can at the very worst, cause injuries to the user and even property damage in extreme cases.
- When uncertain, always charge your LiPos batteries at a rate of 1C. 1C just means to charge your battery at 1A for every 1000 mAh. So, for a 3000 mAh battery, you would charge at 3A, for a 5000 mAh battery, you would charge at 5A.
- Always put your LiPo in a LiPo safety bag before charging.
- Never charge a battery pack that has been punctured or damaged.
- Always charge batteries in an open area away from flammable materials, liquids, and surfaces.
- Never charge your LiPo batteries inside a Vehicle.
- Heat kills LiPos, the hotter a battery gets, the shorter the lifespan will be. Never charge a battery that is still warm after usage, and never use a battery that is still warm from charging.
- Never let the positive and negative battery leads touch each other. This can lead to a short circuit which may heat the battery up and ultimately, lead to a fire or explosion.
- Always check the voltage of your LiPos before charging to ensure that they are at, or above the minimum safe starting voltage. If starting voltage is below recommended levels, then your LiPo was probably over-discharged or has experienced a failure and should NOT be charged.
- If you notice your LiPo battery is swelling (puffing) while charging, stop immediately and dispose of it once it has cooled down.
- Never leave a charging battery unattended; this is the single biggest cause of all LiPo accidents. If you need to step out for a bit, stop charging and unplug everything, resume when you are back.
How To Store A LiPo Battery:
- If you will not be using your LiPos for more than three days, then put them into storage mode.
- Never store your LiPos fully charged or empty. The standard is to store a regular LiPo at around 3.8V per cell (around 70%-80% charged). Make sure each cell is as balanced as possible.
- Always put your LiPos in a LiPo Safety Bag when storing.
- Always store your LiPos at a temperature of between 4 – 21°C.
- A big help is to use a Voltage Checker
UPGRADE A CAR
How Can I Upgrade My Car?
After a couple weeks use most owners of an RC car will start to think about how they can make the car faster! Whilst this is natural, sometimes its not as simple as sticking a new motor into the car. Inevitably upgrading the motor and increasing the cars performance is pretty simple, however there are several things that you need to consider:
– Ballrace / Bearings. Many entry level RC cars do not have bearings installed, they use plastic bushes in the hubs. “Ballracing” a car means that you replace all of the plastic bushes with a proper bearing – this makes the car more efficient and free-running as there is less rolling resistance.
– Gearing. Often the motor in the car has plenty of power in reserve to propel the car faster, however the gearing of the car is the limiting factor. So often the cheapest way to unlock extra top speed or acceleration is to research the gearing. Often changing the pinion gear in the car makes a noticeable difference to the cars performance. As a rule of thumb changing the pinion to a gear with more teeth increases the cars top speed, however this slows acceleration. Whilst slower acceleration might not be very noticeable in a road going car, the loss of acceleration can have a big impact with an offroad vehicle.
There are also other things to consider. If you use a combination of gears that is too tall for the installed motor you will place extra stress on the motor and ESC, therefore shortening the life of both components.
– Motors. Just sticking a more powerful motor in the car doesnt necessarily make a car quicker, as above the gearing plays a very important role in the cars performance. Motors are not always tuned to give the highest RPM (i.e best top speed). Some motors are tuned for low down torque, this is especially handy in offroad applications where the car needs a constant steady power delivery.
– Brushless Conversion. Most of our assembly kits come as standard with a Brushed Motor and ESC set up, this is the standard for entry level models because its reliable and cost effective. Installing a Brushless Motor is normally a sure way of dramatically increasing the performance of the car, however please be aware that some components in a standard assembly kit are not designed to take the extra power. The extra power will place extra stress and in some circumstances break some components.
– Suspension. Many entry level RC Cars come with a basic spring action suspension damper. Whilst OK for basic use, better performance can be had from a Oil filled damper – with better damping and more adjustability its possible to fine tune your cars suspension traits for varying scenarios both on and off road.
– Tyres. Do not underestimate tyres on an RC Car. You can have all the power and torque you like, but if the chassis cannot put this power into the surface then you will not see any improvement in performance. For road cars tyres are usually available in different compounds (softer/harder), with softer tyres offering more grip on dry hard surfaces.
TROUBLESHOOTING
Transmitter Will Not Connect To Receiver
All of the Radio sets we supply are 2.4ghz, so do not require crystals or matching frequencies to operate. However they do need to learn one another by “binding”. Out of the box it’s likely that the Transmitter will talk to the receiver. If not please follow the instructions that came with the Radio set to Bind/pair them.
Steering Servo Will Not Work
Its very rare that Servos are faulty, so we always advise that you follow this simple test. Most RC cars only operate on 2 channels, one for steering and the other for the motor.
The first thing to check is whether you have paired the Transmitter with the Receiver correctly, please follow the binding/pairing instructions in the manual. If this process has not been completed correctly then the Transmitter will not be able to control the Servo.
If you are confident that the Radio set is correctly paired and the Servo still does not work we recommend that you try the servo in both channels (CH1 AND CH2) – this tests whether both ports on the receiver work correctly.
IF the Servo operates on only one Channel we may be able to conclude that the receiver has an issue and only one channel is operational (please contact us)
IF the Servo does not operate at all, its possible that either the Servo OR Receiver is faulty. If you have another RC car please try plugging the Servo into the receiver on the new car and see if it operates, as this will indicate whether or not the receiver works.
If you do not have another Servo to test, please continue to connect the ESC/Motor to the receiver and test in both Receiver channels. If you can control the motor in both channels its safe to say the Servo is faulty and needs replacement. If you cannot control the motor please contact us.
Car Will Not Drive
| There are a couple reasons why the car might not drive correctly, but first of all you need to break the issue down and isolate what the issue is. i.e Is there a problem with the motor and gears? Or is the problem to do with the Electronics talking to the motor.
So first up, can you hear the motor operating when you move the throttle stick on the controller? If you can hear the motor operating and the car is not moving, you can be confident that the issue is not to do with the ESC or Radio set up – the issue is likely to be in the drivetrain/gearing system. The first thing to check is whether the metal pinion gear is secured to the motor correctly – does the grub screw sit on the flat part of the shaft? If the pinion gear is correctly installed all we can really suggest is that you take the gearbox apart and re-assemble following the instructions carefully. If you cannot hear the motor moving and the car still does not move, the issue can be one of a couple things. 1 – ESC (Electronic Speed Controller) is not set up correctly. The first thing you need to check is that you have paired the transmitter and receiver correctly, follow the instructions of the radio. IF you are able to control the steering you can be assured that the Radio set is correctly paired. If you cannot control the steering then please try pairing the radio and transmitter again. If the steering servo works, yet the controller will still not control the motor we need to check whether both channels 1 and 2 on the radio set are working correctly. We can check this very easily: The steering servo plugged into channel 1 and the ESC will be plugged into channel 2. So, if the steering is working correctly in channel 1, swap the plugs around and see if the steering can be controlled by channel 2. If you can control the steering servo on both channels you can be confident that both the receiver and the transmitter are working correctly and that the issue lies with the ESC or battery. If the steering servo can only be controlled from one port in the receiver then its possible there is an issue with the radio set.
|
Steering Servo Only Turns A Small Amount
If your steering servo only moves a very small amount, or makes a noise and doesn’t move at all – this can be as simple as adjusting the sensitivity of the servo.
On the transmitter you will find several sliders/knobs, look for one labelled ST. D/R (Steering Dual Rate). This dial simply controls the sensitivity of the servo, if you adjust this and try again you will find the servo operates as expected.
Car Does Not Run Straight
There are a couple reasons the car doesn’t run straight, the most common being:
– Servo needs trimming. On the transmitter you will find a dial/knob which is labelled ST Trim (Steering Trim). This simply makes minor adjustments to the resting/neutral point of the servo when no steering lock is applied on the controller. Drive the car away from you in a straight line and adjust this until the car drives straight.
– Servo was not centred when installed. If you have tried the above and you find that you do not have enough adjustment on the trim dial to make the car drive straight, its possible that the servo was turned off centre when you installed the steering arms etc. To ensure the Servo is set in its centre point, you need to:
– disconnect the Servo horn from the Servo shaft.
– centre the trim dials on the transmitter.
– power the car up and move the servo around. When you let go of the steering control the servo should return to its central position.
– Put it all back together.
Car Stops Every Couple Seconds
If your car has been operational but then comes to a halt and proceeds to move several feet every few seconds its very likely that your battery is flat. Most modern ESCs have a battery cut off function which slows the car to a halt when low voltage is detected. However if left for several seconds the voltage can recover slightly allowing the car to move again, only to stop a couple feet later when the ESC detects the low voltage.
In this case you need to recharge your battery. Ensuring that you charge it for long enough, please see the charging answers above for further information.
Differential shimming
Shimming is an esential part of building a rc car, especial in competition. It adjusts how the differential fits into the differential case and that gears suit together perfectly as possible. Due to building and production of parts, the amount of shim discs could be different from each car. Please Note, the manual shows a amount of discs due to main quantity of cars. It could be that the amount of shims on your car is different to the manual. So always check that differential fits tight into the diff-box and the gears fit properly to each other!


